Python 数字图像处理实验一
一、安装环境
这个比较简单,直接一个 pip 命令安装即可:
pip install opencv-python然后,实验手册上建议的是使用 Python 虚拟环境,这个也比较简单,但是,我的笔记本上的 Python 物理环境暂时不需要作其他用途,所以,就直接用这个 Python 来做实验了。
关于写 Python 的 IDE,这里推荐使用 PyCharm。
二、实验内容
2.1 图像的读取和保存
# -*- coding: utf-8 -*-
# @File  : test01.py
# @Author: FanyFull
# @Date  : 2021/10/15

# 读取图片
# 可以选择简单退出
# 或者选择保存到另一张图片之后再退出

import numpy as np
import cv2

img = cv2.imread('./pictures/test.png', 0) # 试着修改 0 为 1
cv2.imshow('image', img)
k = cv2.waitKey(0)
if k == 27:
    cv2.destroyAllWindows() # wait for ESC key to exit
elif k == ord('s'): # wait for 's' key to save and exit
    cv2.imwrite('./pictures/test2.jpg', img)
    cv2.destroyAllWindows()
2.2 读取视频文件,显示视频,保存视频文件
2.2.1 读取并显示视频
# -*- coding: utf-8 -*-
# @File  : test02.py
# @Author: FanyFull
# @Date  : 2021/10/15

# 读取视频内容

import numpy as np
import cv2

cap = cv2.VideoCapture('./pictures/vtest.avi')
while(cap.isOpened()): # 当上面的 VideoCapture 类初始化完毕之后,isOpened() 就会返回 true
    ret, frame = cap.read() # read() --> Grabs, decodes and returns the next video frame.
    if ret: # 如果还有下一帧
        gray = cv2.cv2.cvtColor(frame, cv2.COLOR_BGR2GRAY)
        cv2.imshow('frame', gray)
    if cv2.waitKey(1) & 0xFF == ord('q'): # 按 q 退出
        break
cap.release()
cv2.destroyAllWindows()
2.2.2 从摄像头获取图像并保存为视频文件
# -*- coding: utf-8 -*-
# @File : test03.py
# @Author: FanyFull
# @Date : 2021/10/15
# 注意,这里似乎有点问题,这个摄像头捕获的文件是怎么确认的?
# 从摄像头中捕获视频,沿水平方向旋转每一帧并保存它
import numpy as np
import cv2
cap = cv2.VideoCapture(0) # 摄像头编号
# Define the codec and create VideoWriter object
fourcc = cv2.VideoWriter_fourcc(*'XVID') # 注意编码器,这里是指定 FourCC 编码
out = cv2.VideoWriter('./pictures/output.avi', fourcc, 20.0, (640, 480)) # 第三个参数是帧数
while(cap.isOpened()):
ret, frame = cap.read()
if ret == True:
frame = cv2.flip(frame, 0) # 翻转图像,垂直翻转
# write the flipped frame
out.write(frame)
cv2.imshow('frame', frame)
if cv2.waitKey(1) & 0xFF == ord('q'):
break
# Release everything if job is finished
cap.release()
out.release()
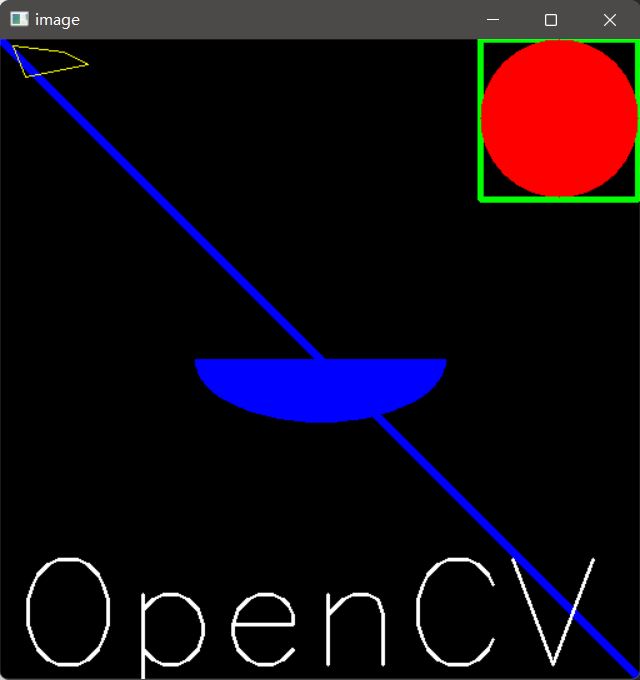
cv2.destroyAllWindows()2.3 opencv 画图
# -*- coding: utf-8 -*-
# @File  : test04.py
# @Author: FanyFull
# @Date  : 2021/10/15

# OpenCV 绘制图形

import numpy as np
import cv2

# Create a black image
img = np.zeros((512, 512, 3), np.uint8) # np.uint8 是数据类型

# Draw a diagonal blue line with thickness of 5 px
# 绘制直线
cv2.line(img, (0, 0), (511, 511), (255, 0, 0), 5)
# 绘制矩形
cv2.rectangle(img, (384, 0), (510, 128), (0, 255, 0), 3)
# 绘制圆
cv2.circle(img, (447, 63), 63, (0, 0, 255), -1)
# 绘制椭圆
cv2.ellipse(img, (256, 256), (100, 50), 0, 0, 180, 255, -1)
# 绘制多边形
pts = np.array([[10, 5], [20, 30], [70, 20], [50, 10]], np.int32)
pts = pts.reshape((-1, 1, 2))
cv2.polylines(img, [pts], True, (0, 255, 255))
# 绘制文字
linetype = cv2.LINE_AA
font = cv2.FONT_HERSHEY_SIMPLEX
cv2.putText(img, 'OpenCV', (10, 500), font, 4, (255, 255, 255), 2)
cv2.imshow('image', img) # 显示直线
cv2.waitKey (1000) # 显示 1000 ms 即 1s 后消失
cv2.destroyAllWindows()
运行结果:
2.4 opencv 处理鼠标事件
# -*- coding: utf-8 -*-
# @File  : test05.py
# @Author: FanyFull
# @Date  : 2021/10/15

# 处理鼠标事件

import cv2
import numpy as np

# 当鼠标按下时变为 True
drawing = False
# 如果 mode 为 True 绘制矩形,按下 'm' 变成绘制曲线
mode = True
ix, iy = -1, -1
# 创建回调函数
def draw_circle(event, x, y, flags, param):
    global ix, iy, drawing, mode
    # 当按下左键时返回起始位置坐标
    if event == cv2.EVENT_LBUTTONDOWN:
        drawing = True
        ix, iy = x, y
    # 当鼠标左键按下并移动时绘制图形,event 可以查看移动,flag 查看是否按下
    elif event == cv2.EVENT_MOUSEMOVE and flags == cv2.EVENT_FLAG_LBUTTON:
        if drawing == True:
            if mode == True:
                cv2.rectangle(img, (ix, iy), (x, y), (0, 255, 0), -1)
            else:
                r = int(np.sqrt((x - ix) ** 2 + (y - iy) ** 2))
                cv2.circle(img, (x, y), r, (0, 0, 255), -1)
    # 当鼠标松开时停止绘画
    elif event == cv2.EVENT_LBUTTONUP:
        if mode == True:
            cv2.rectangle(img, (ix, iy), (x, y), (0, 255, 0), -1)
        else:
            cv2.circle(img, (x, y), 5, (0, 0, 255), -1)

img = np.zeros((512, 512, 3), np.uint8)
cv2.namedWindow('image')
cv2.setMouseCallback('image', draw_circle)
while(1):
    cv2.imshow('image', img)
    k = cv2.waitKey(1) & 0xFF
    if k == ord('m'):
        mode = not mode
    elif k == 27:
        break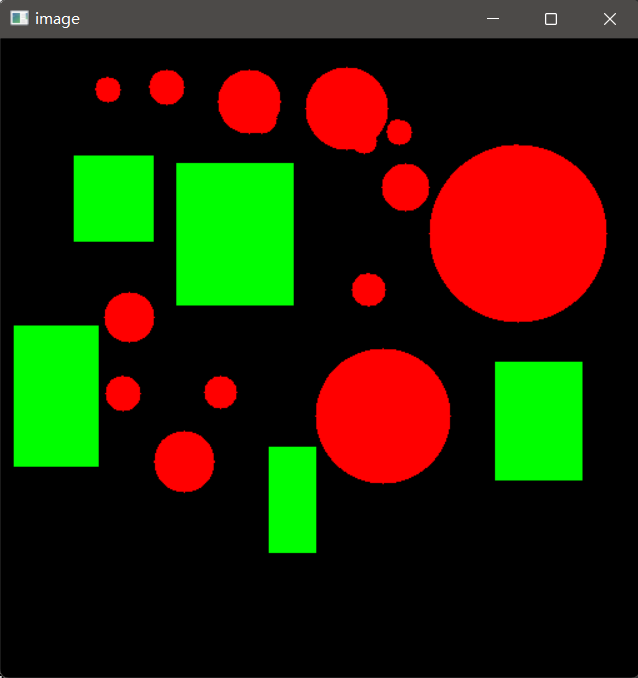
Python 数字图像处理实验一
http://fanyfull.github.io/2021/10/17/Python-数字图像处理实验一/